Bump Nodes
DS: are we doing any stuff up in S1 tonight?
JR: idk
NS: we could do a little Bump mapp understanding DS: ok
NS: If janet is up to it DS: just an hour?
JR: ok
NS: Yes DS: ok
DS: at the lakeside maybe?
NS: Ok that should be ok JR: ok
DS: yes
NS: So i think we been tough how to add a buimp map to a texture DS: so you are noticing things ar much nicer colours now janet?
NS: and last time we saw how one canmake a texture JR: yes and i do get m inimal reflections
JR: ok listening to night
DS: yes
NS: and draw on that to make a bumps JR: yes
DS: yes
NS: So that is en way but it is of course also to use an external bump map like we did with the Ai generated gray pictures JR: yes
DS: yes
NS: load a gray map file and then include that IN order to use that - the external option one need to know where to draw JR: right
NS: and in order to get that information the UV mapping can be exported as a file and one can use PS to guide how to draw the bump map So today we try to make that JR: hm ok
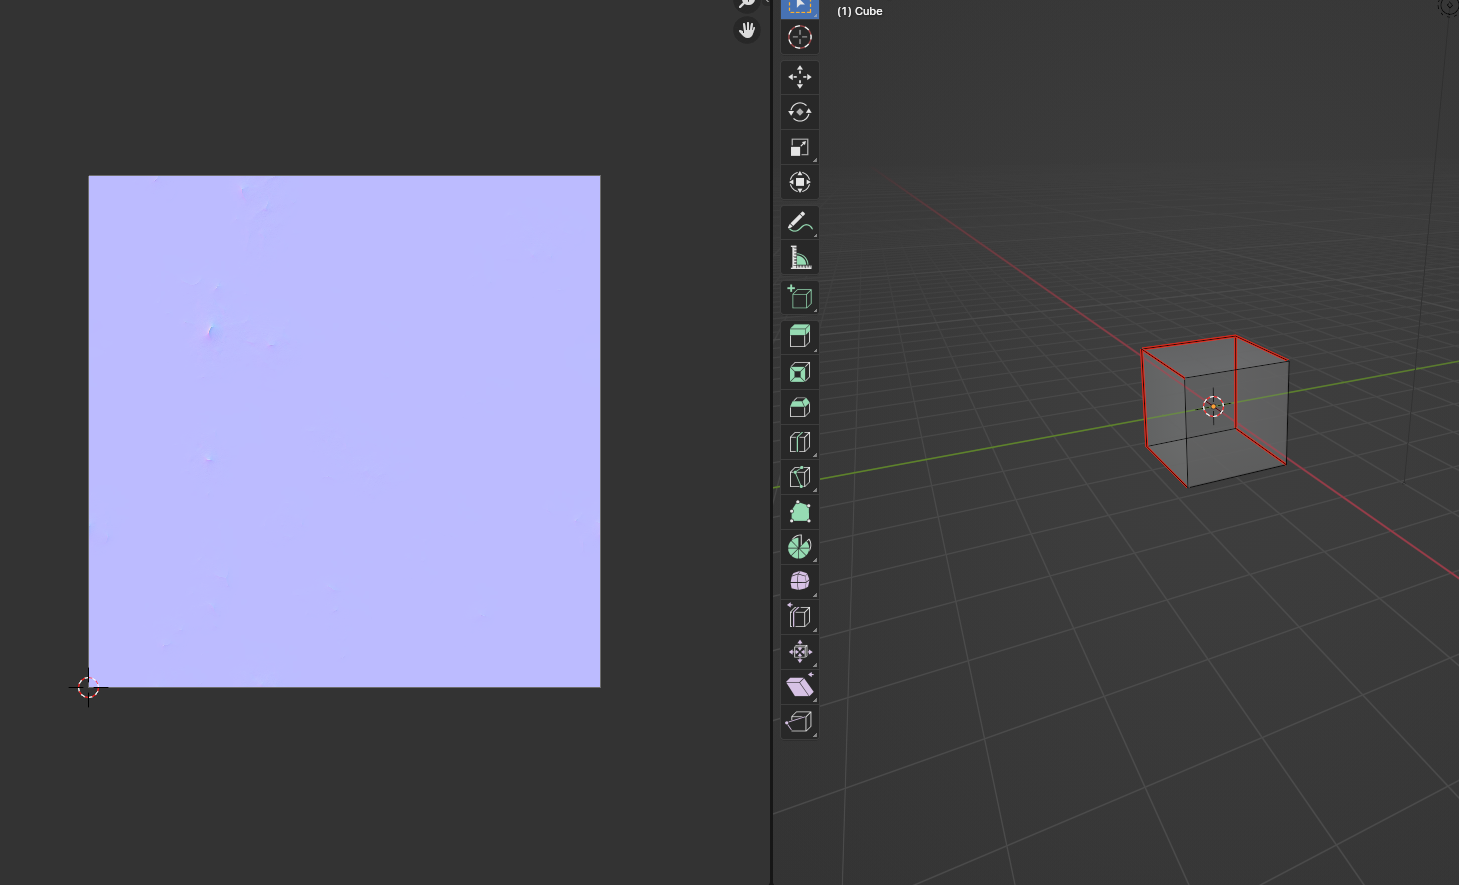
NS: and then bake the new normal map So we can start as always with a cube JR: yes
NS: and then we like to have a texture Old Brass will be good if we search that JR: please mention what layout you’re in
NS: that will be shading DS: shall we start from a cube again?
DS: ok
NS: yes start with a cube always good then find old brass texture and add to the cube JR: yes
NS: the next thing is to unwrap the cube so we have a nice UV system and there is of c ouse many ways bu basically one goes to the UV editor mode “UV Editing and then maybe apply a few seams and do a unwrap or one can jsut let it do by it self JR: i did UV Unwrap and nothing happened on the picture
NS:
NS: you select the cube go in edit mode select all press U for unwrap and you should see the unwrapped lines on the picture frame is all the cube is selected in edit mode all borders JR: made a very weird decision, two squares and a rectangle
DS: same here
NS: yes it is the tupical UV DS: mark those seams ?
NS: make some wierd choices thay is why i always operate with seams i decide the unwrap JR: two of them are on top of each other in fact
DS: yes
NS: so should be ok ? for now ti is nto a talk about unvrapping ita chapter on its own DS: shall we mark the seams like you did here
NS: yes then you shoudl get the same
NS:
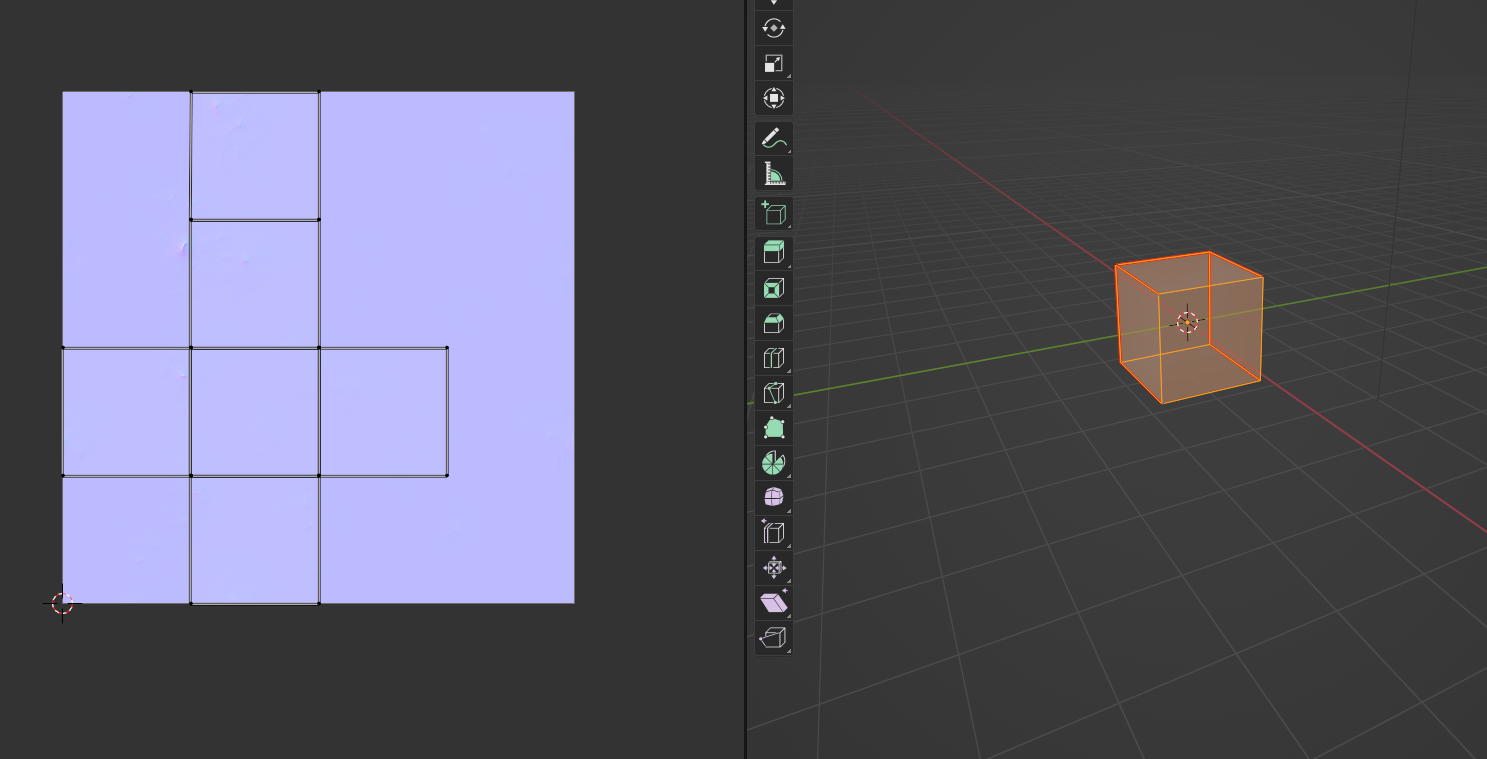
NS: So if we have an unwrapped cube DS: ok got the inverted cross
NS: yes dosent matter Dizzi we just need some unwrap DS: yes
NS: Ok next it to actually get that map to become a file we can work on JR: ok i finally got something i can live with
NS: and fortunately in the main meny in the image display under UV there si an option to export UV layout NS: so with all the borders of the cube s elected on can go to the image panel select UV/Export UV Layout JR: yes exported cube.png
NS: yes and that picture has the black line of the UV layout gray is the objet faces and tranparent is no part of the uv So one can open that in PS and then paint on a new layer the Bump map one like to have JR: when exporting that map will we export only the layer we drew on, or both?
JR: (trying to figure out how best to draw given no PS here)
DS: mm
NS: Yes i see janet DS: you need a drawing package with layers
DS: Krita?
NS: One need some way to have a layerd image JR: yes i can do that, i’m looking ahead to see how to set it up. anyway proceeding
DS: ok
NS: Yes i think the thing one do then is to find the right place to add thing it can be a big problem like the cube we have what is up and down and how to orientate you self in the image So often i use two images one where i mark elements with the textures draw and then export that and then export the UV DS: i used to paint on the surface like we used last and write 1 2 3 …6 on the sides
NS: and then make the real bumpmap on a 3rd layer DS: and esport that
NS: Yes Other tome it is obvious you have a side fo a houese with windows JR: yes. remind me what colors to use?
NS: not hard to figure out what is what If you like to make a bump map it is onely takign black and white info JR: not gray?
NS: Yes gray scaled JR: should one fill with a neutral gray or just draw?
JR: white is up, black is down?
NS: yes DS: i start with a 128,128,128 fill?
NS: yes and then when you are happy you can insert that picture as a bump map just before then normal input to the Principal shader like we saw before JR: hm now of course i can’t see the lines
NS: you have to select the object all lines in edit mode DS: i usualy put the UV out as the top layer
NS: while in the UV editor JR: yes just figured that out :)
NS: Yes i do too - since it is transparent JR: i am still working out how to draw on the thing
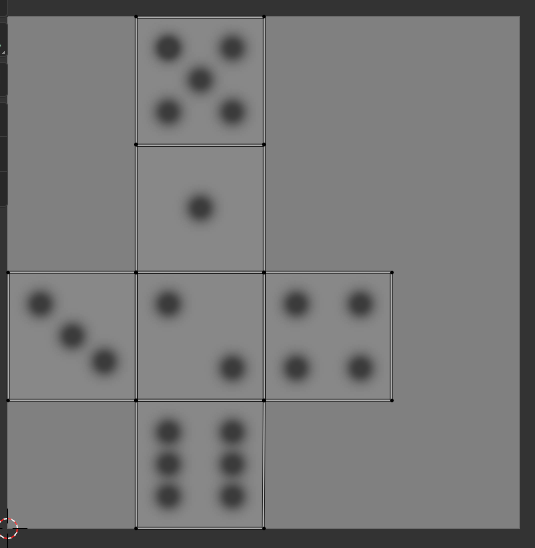
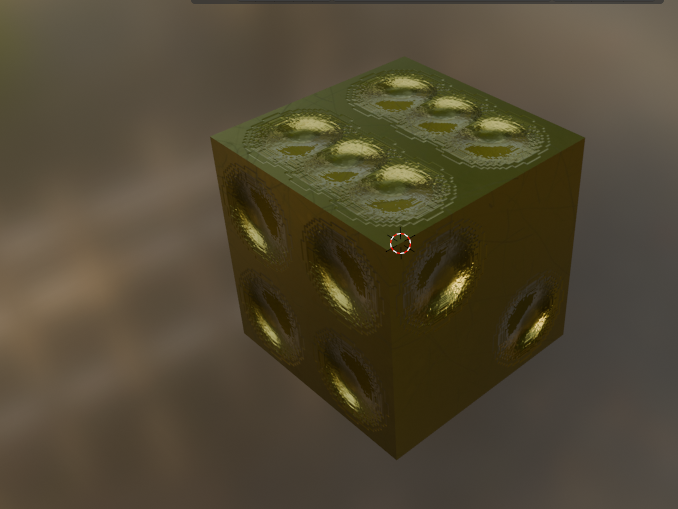
DS: we could try and make a dice?
DS: draw black dots?
NS: Yes sould eb a good try so i made this in PS
NS:
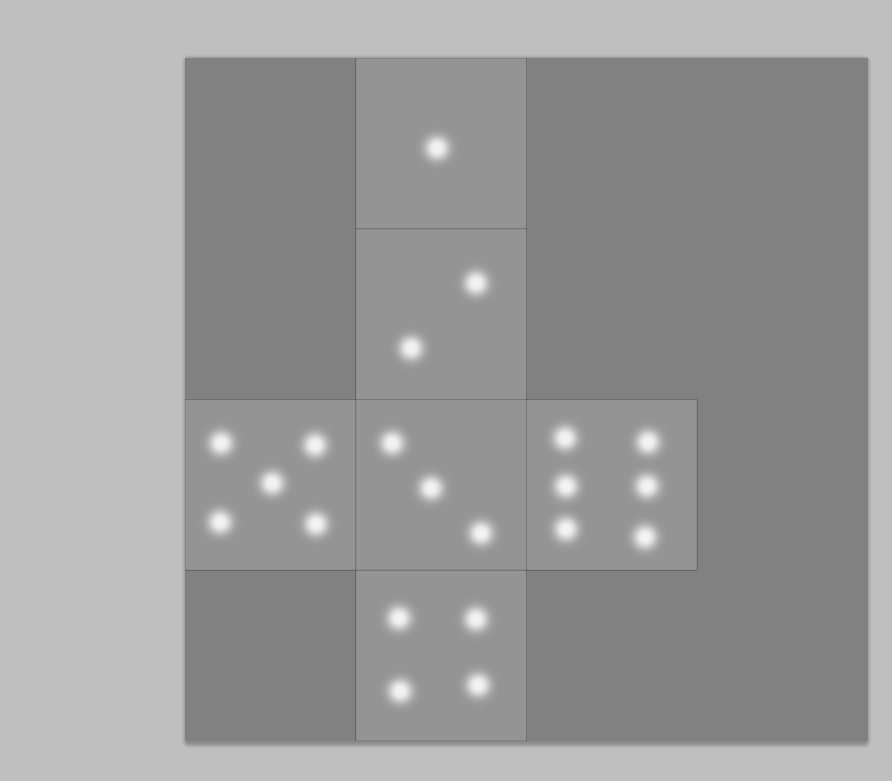
NS: uv layer on top and some doth shoudl be black really lol it is holes DS: white dots?
NS: yes DS: ok
NS: lol need to be black DS: black
JR: ok what should i export, just the layer i drew on?
DS: yess
NS: yes just the layer else the lines will be part of the bumps then when we have that file we can import to Blender Using the Image/Open S i got somethign liek this
NS:
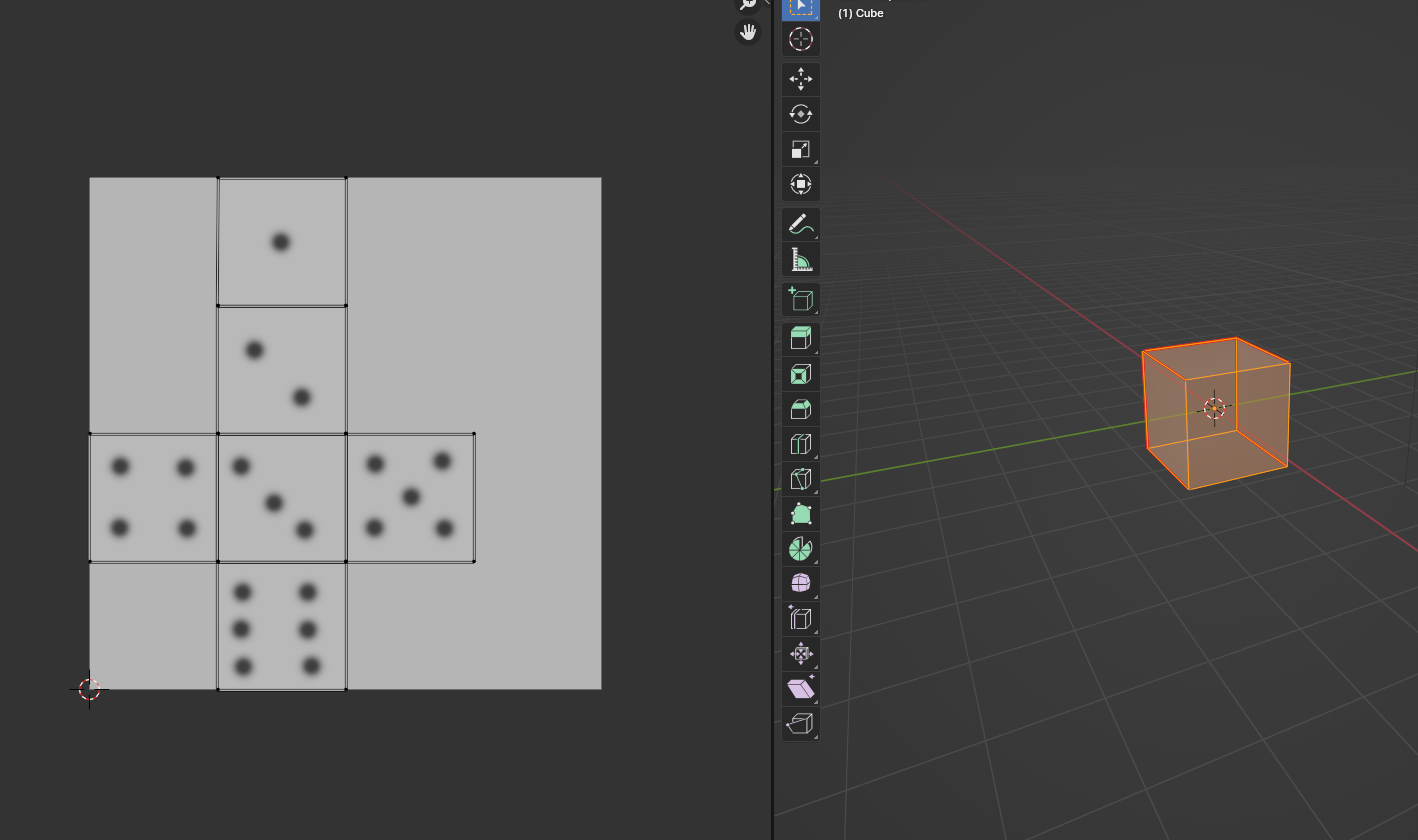
NS: the lines are because i have tthe mesh selected in the UV editor not apart fo the picture JR: i messed up starting over
NS: Ok Janet DS: yes takes a while
DS: i messed up too
DS: i hate PS
DS: :)
NS: Smiles DS: bye the way night the dice is weird, oposite sides have to had to 7
DS: add
NS: yes it uv map is somhow ramdom DS:
NS: Look ok Dizzi DS: yes
NS: So if you have the picture into Blender let me know JR: sorry for sloth trying to get pic back to pc
DS: ok
DS: np
NS: smiles np JR: ok, sorry someone at door
NS: Smiels DS: :)
JR: ok i have pic on desktop ready to go, sorry i’m so slow, had to figure out how to move back and forth to ipad
NS: Dizzi you can try to set up the bump map DS: yes
NS: no problem janet JR: now go back to shader?
NS: Now import to blender DS: ill just keep up with janet
NS: then go to the shader Ok and we go into the node window inthe shader DS: yes
JR: how do i import it?
NS: in image menu there is a open picture or you can drag it in or use the texture node in the image display you fing a meny called image JR: ah found it
JR: ok it is in
DS: in the hambuger
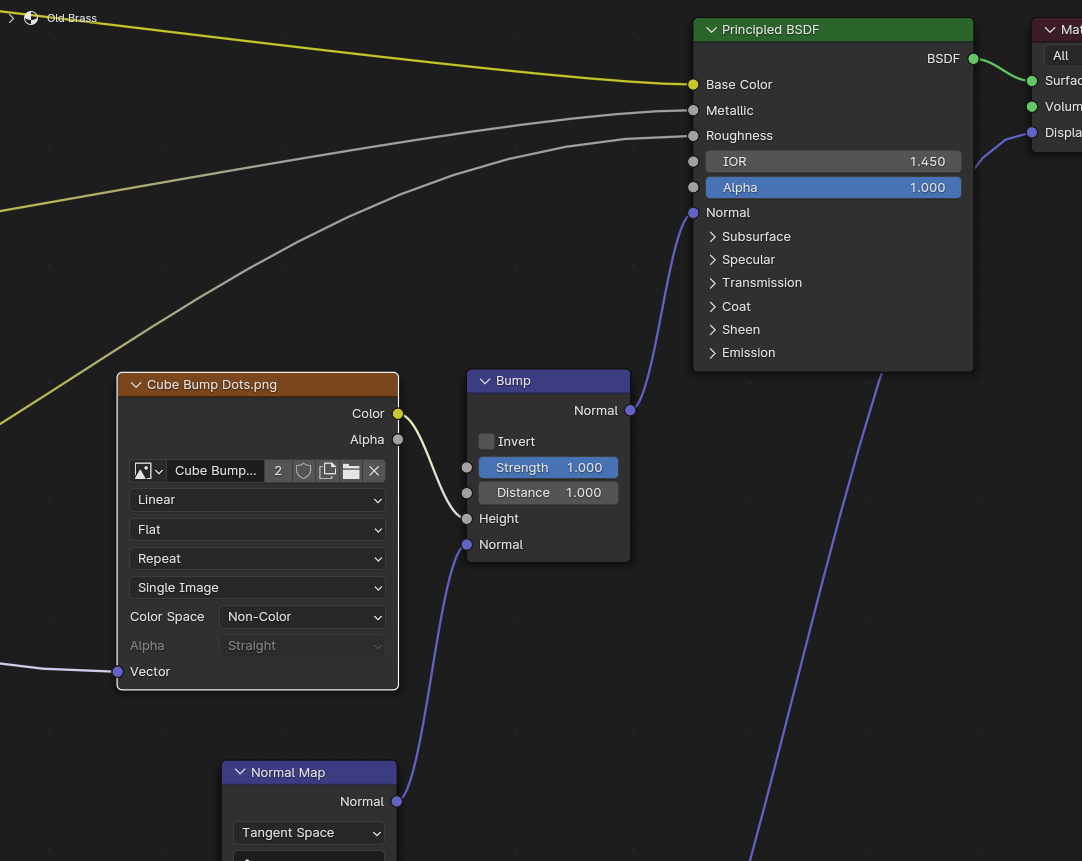
NS: o next is to add the bump mapping yes inthe hamburger You remember we add a bump map node and an image node and the s etup si like this
NS:
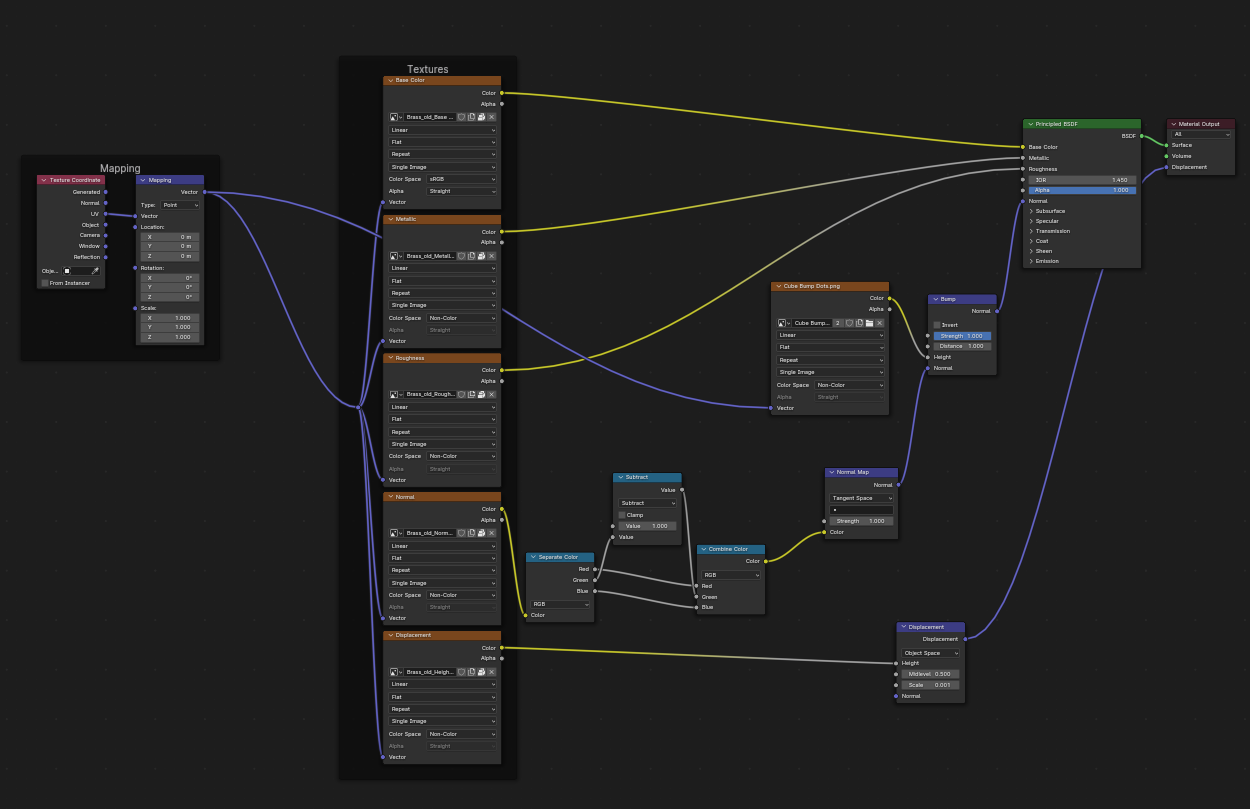
NS: you can drag the other nodes aside to make room for the two so 1) Bumpmap just before the normal input to the principal shader JR: too fast
NS: getting the roginal normal input DS: i cant see the text in your screengrab night
NS: if you click to enlarge ? DS: yes even then
NS: ok i make a detail
NS:
DS: thanks
NS: the normal input to the texture is of course the UV map the mapping input JR: is the cube map thing an image node?
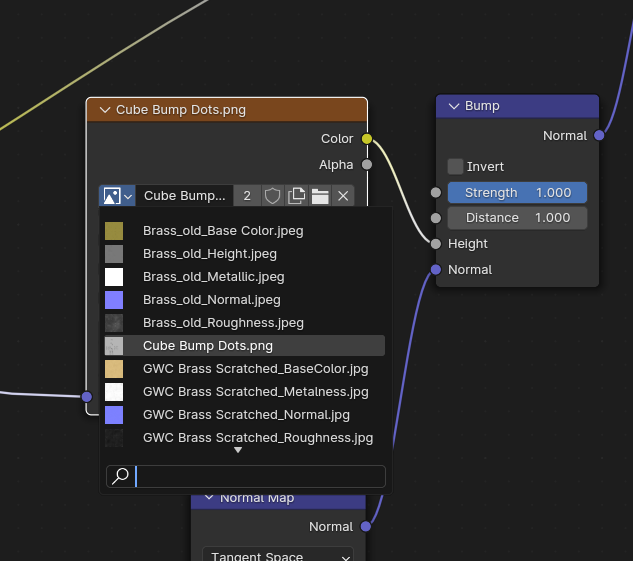
NS: yes the texture you made Jananet is the Immage you need to have in the image node so you can select from the node the image to use
NS:
DS: woot
NS: i ahave more textures looking for a good texture JR: also woot
NS: In the Image node DS:
NS: there is a field to select the texture open that and then you can select the image you like the little icon of a mountain and a sun JR: yes got that. pic on screen is good
NS: inthat line one have also option to open a image DS: :)
NS: so if the image is in and the node is connected you should see the bumps JR: yes i see the bumps. woot = i see the bumps :)
NS: SMiles All see bumps my look liek this JR: yes
NS:
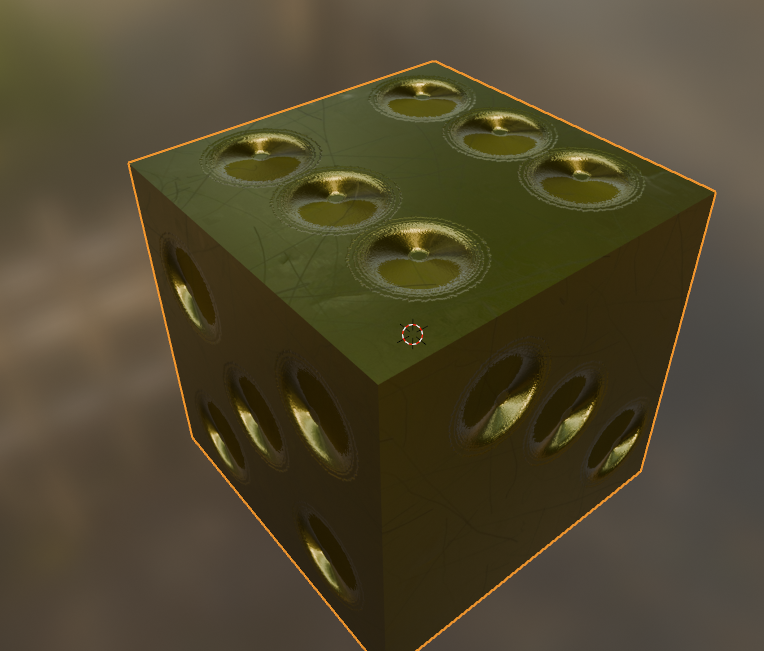
DS:
NS: very simmilar JR:

NS: and nice artistic Janet DS: :)
JR: i personally hand-crafted that. LOL
NS: Ok the last thign for today Yes lol JR: is getting it out, i hope
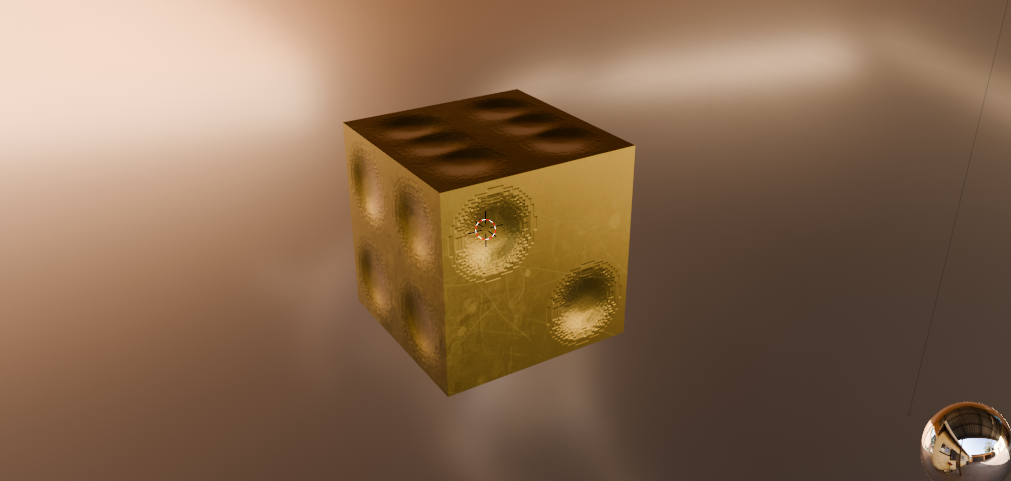
NS: we jhave to controll the Bump Node We have a several option in that to change what we do The first element is the DIstance I told you last time not to play with that But was to amke things simpler Image you liek to make bumps and you have some idear of the hight or dept of them NS: then the value shoudl be set to the max value you like here maybe 10 cm so the Distance shoudl be like 0.1 and i f you notice the bump are mich less jerky So one tune the distance into a setting where the bumps hight is about the expected visually I may go to 0.2 NS: and will ebhappy in my model JR: doesn’t make much difference tho?
NS: the strength can then be use t determine the influence No but what it does janet is to smooth the side of you bumps a bit JR: ah
NS: then other thign to use is of course the strength so those values are nearly always adjusted ontill one is pleased wit the result and it dosent affect the other normal map since it is just added on top JR: yes
NS: You can alse see that the bumps Dizzi and i have are a bit like pyramids that of couse depend on the fall of of the brush one use how the gray is converted into hight JR: yes i couldn’t find a brush that wasn’t solid but i have them somewhere
NS: yes JR: do we have time for a quick reminder of how to get this onto an SL object?
JR: getting kind of late
NS: yes But it think we a re here DS: save blend?
NS: If you fisrst can see the effet of the bump map on your model it is super easy to make a new Normal map Yes we can save So we have all the tools to add a bumpmap what ever in most convinient for the situation I used PS and Blender to do it and i think i get more and more fond of using the Draw on the object directly option for line and doth and for figures i am using PS JR: yes … if i can get it to display on my iPad i would like that as well
NS: Yes DS: loki sitting on me
NS: Smiles DS: :
NS: Nice with company Dizzi JR: how do we get this combined map out to make it available to SL?
NS: Then you have to bake the Normal map DS: export the cube
DS: as you created a UV for it
DS: yes then bake normals
NS: Yes maybe we should do the baking after the weekend DS: yes
NS: because it is a bit confusing too JR: yes or dizzi might help me tomorrow
NS: Yes DS: ok
DS: yes
NS: She know how to do JR: anyway time for me to log
Dizzis and Nights Blessing 2.0 (dizzi): Dizzi would like give you a hug. Click [Yes] to accept.
DS: yes
JR: :) thank you, i now know a bit more
NS: So janet have a nice weekend Dizzi: /me gives Janet a big hug.
VISTA ANIMATIONS HUD 3.6 DANGEROUS GIRL v3: NightShade would like give you a kiss. Say [Yes] to accept.
DS: the results look excellent
JR: you too, night, see u monday
NS: Yes i will be here JR: safe paths
DS: see you tomorrow
JR: yes
[